Showing posts with label dinner. Show all posts

Charcuterie 101


Sometimes a charcuterie board is the only dinner you need!

While the arrangement may be simple, these foods are glorious!

Lifestyle changes are easy to keep up with when they're fun, convenient, and sustainable.

It sure helps when they're pretty too!

Also- I've learned that dates and cheese... followed by a Turkish fig... are a favorite snack combo!

Umm... yum!

Pair that yumminess with some summer sausage, prosciutto, cornichons, olives, and even more cheese... you're all set!

What's one of your favorite things to munch on?


Benfield Jalapeno Cornbread


This was hands down the best cornbread we've ever made. Aaron and I tag teamed this one and crushed it!

To (quite literally) spice it up, we threw in some diced jalapeños, too.

This was just one of three pans used... the mixture made a decent amount.

I've never been huge on cornbread, honestly... but I could eat this quite often.

1 2/3 cup yellow cornmeal
1 2/3 cup all purpose, unbleached flour
1/2 cup granulated sugar
2 tbsp baking powder
1 1/2 tsp salt
1 2/3 cup almond milk
4 large eggs, lightly beaten
1/2 cup, plus 2 1/2 tbsp unsalted butter, melted

Preheat your oven to 375F. Place your generously greased cast iron skillets in immediately, so they can get piping hot. 

In a large bowl, mix your dry ingredients. Once combined, make a well and pour in your wet ingredients. Stir together the wet and dry ingredients just until combined. Your batter should still be slightly lumpy. You don't want to overmix. 

Remove your cast iron skillets and pour in your batter. Bake until the bread is golden brown around the edges. (If you're using a "special" cornbread cast iron skillet like the one in the picture (or the ones that look like corn cobs) you'll bake for about 7-10 minutes.) If you're using a normal cast iron skillet, you'll bake about 25-30 minutes. A cake tester inserted into the center should come out clean. Let the cornbread set for at least15 minutes before you try to remove it from the pan.

I'm telling ya; pairing it with the right soup would make some hearts warm and happy this winter!


Don't Sleep on Eggplant


Too many of y'all be sleeping on eggplant!
.
I did for too long. It was too bitter for me. Convinced it was a disgusting veg. But about a year ago, I watched a YouTube video of @countrylifevlogs68 and learned to slice it up and soak in salt water for at least an hour first.
.
Game changer!
.
That removes all the nastiness. (Your water will be a 1902 Wild West tub water brown.)
.
Yum!
😂🤪
.
But after your pieces have soaked and are dried with a towel, you can begin your meal prep.
.
Eggplant parmigiana has become a fave in the Benfield house. Definitely a healthy, delicious staple in our menu.
.
What are your favorite eggplant (aka aubergine) meals? I'd love to try out some new ones!


Easy Italian Chicken and Rice


Let me tell y'all about one of my favorite meals... ever.

This incredibly easy, quick, and delicious Italian Chicken and Rice dish is perfect for busy families.

To start, put 2 tbsp of your favorite butter in a deep pan, over medium-low heat. As it's melting, add about 2 tbsp of your favorite Italian dressing, too. (Stay tuned and I'll share my recipe for homemade Italian dressing.)

Once the butter is melted and the dressing is warm, add 3 chicken breasts, cubed.


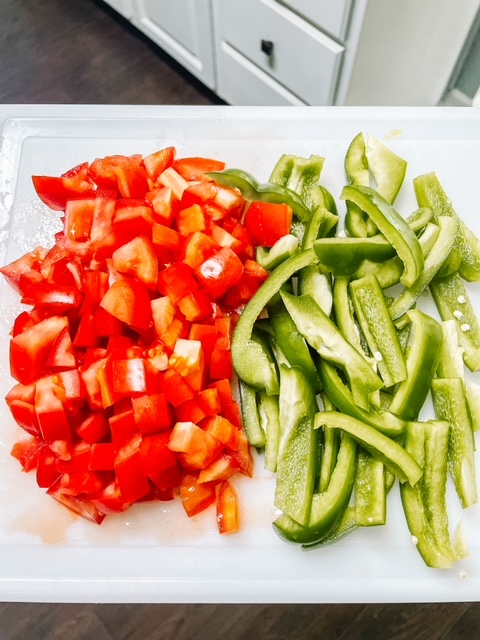
While your chicken is cooking, dice up 2 large bell peppers and 3-4 tomatoes.

(This is perfect if you're trying to find uses for your freshly grown veggies like me!)


Once your chicken is just cooked through, add 2 cups water and 2 1/2 cups of instant brown rice. It may require more water, so just pay attention and add about 2 tbsp at a time, if you feel the rice isn't submerged enough.

Once I get it all mixed up, I usually add another 2-4 tbsp of Italian dressing. 
(Be prepared, you're going to pretty much use the whole bottle.)

I usually add in about 3/4 cup of my favorite chicken stock now, too.


I usually let this cook uncovered for about 5-7 minutes before adding in my bell peppers. 


Once you've dropped them in, add in another 2-3 tbsp of Italian dressing and then cover!


I usually let this simmer for about 7 minutes before removing the lid. (Make sure there's enough liquid left in the pan, although your rice should be absorbing quite a bit now and softening up.) 

Your peppers' color should change to a deep olive green when they're cooked through. 


Once the lid is removed, add in your diced tomatoes and (you guessed it!) at least 2-3 more tbsp of Italian dressing. Stir the mixture up and let it simmer uncovered for another 5-10 minutes. 


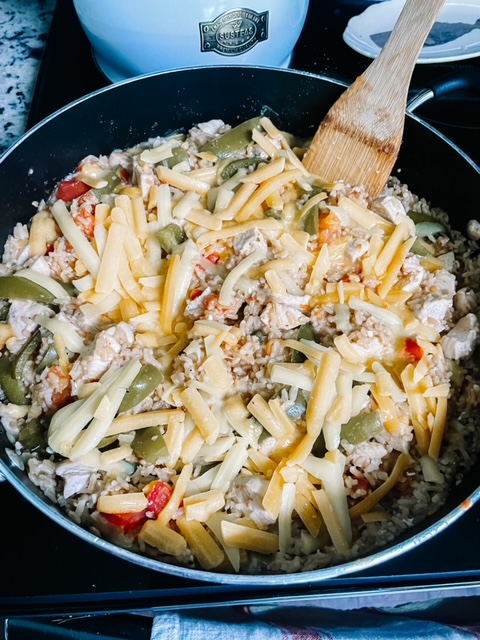
Once your rice is fluffy and fully cooked through, your dish is ready for the final addition of Italian dressing and some shredded cheese. 


Once your cheese melts, this lovely dish is ready to serve!

I love this meal for its taste, simplicity, and for the fact that I can easily calculate macros. It's a perfect combo of carbs, proteins, and fats... as long as you can control the portions. And that, my friends, is a little hard to do. 

This recipe serves 6 easily or allows for leftovers... which is an absolute favorite of mine. 


Would you just look at that creamy, colorful goodness?! 

Try it out and let me know what you think. 


Asian Fish Cakes - @jamieoliver


Thes Asian fish cakes are the absolute freakin bomb.

Thanks to @jamieoliver for his quick and easy, deliciously healthy, and impressively beautiful recipe for busy folks!

1 lb salmon filets (remove the skin)
Chop into "cubes"
1/2 stalk cilantro, diced (stalk and all)
Save a few leaves for garnish
Ginger (I used about 1 tsp ground ginger)
1 stalk lemongrass, diced (remove outer layer)
Salt/Pepper
Sweet Chili Jam


Heat 1 tbsp extra virgin olive oil in a non-stick frying pan.

Mix all the above ingredients well. Then, create patties about 1 inch thick. Fry for approximately 2 minutes, each side, on medium-high heat. 

Top with your favorite sweet chili jam and a few more sprigs of cilantro.


Serve with rice, couscous, quinoa, potatoes, asparagus, or steamed broccoli.

Simple. Fast. Nutritious. Slap yo' mama good!


Roasted Potato Medley


Y'all!

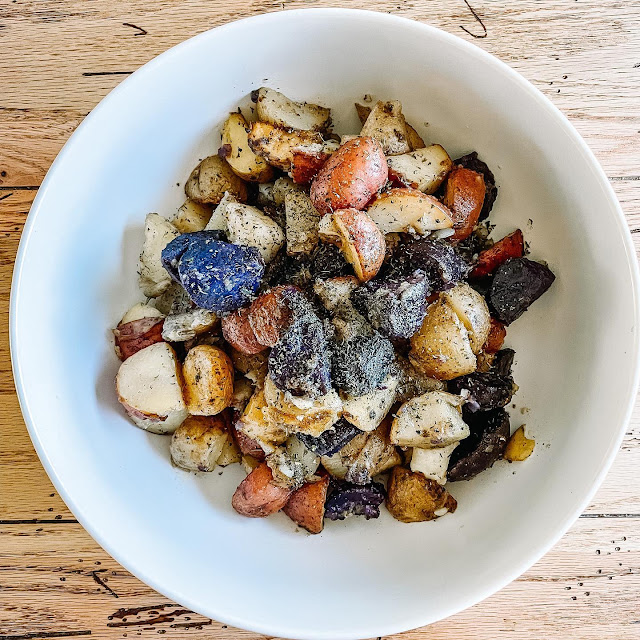
These are the most delicious potatoes. Omg. 

I used 2 bags (2 lbs) of the fingerling potato medley. (Gold, red, and purple.)

I cleaned them, cut them into fourths, and placed them in a coated (with olive oil) 9x13 baking dish.

I also added 4 peeled and sliced garlic cloves in with them.

Tossed them with generous amounts of:

Vegan butter
Salt
Pepper
Parsley
Dill
Onion Powder
and just a tad more garlic powder.

Bake them for about 7 minutes until butter melts and toss until all potatoes are coated. 

Then, bake another 35-40 minutes (covered with foil for about 30) on 425°F... and boom!

Absolute deliciousness for the tastebuds. Man.

Try it out!


Our "Make Your Own Pizza" Party


Eating clean doesn't mean you have to cut your favorite things out of your life. 

You just make them better. 

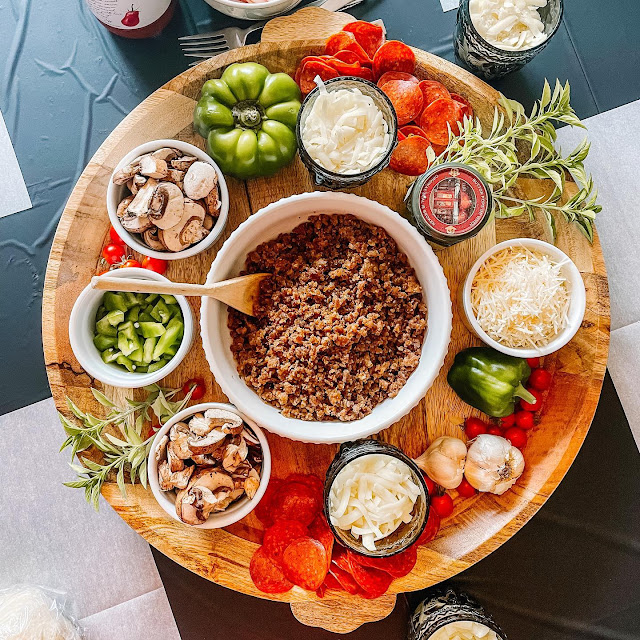
A little while back we hosted a "make your own pizza" party, and it was such a cool experience!

And- I could do it all again while on my "cleaner" journey.


Homegrown (or locally grown) veggies, all natural cheeses, turkey burger or grass fed beef, turkey pepperoni, homemade or organic sauces... all on top of unbleached, organic flour, etc. 

Possibilities are endless. 


This pizza dough was incredible, too!

@tasteandtellblog

2 1/2 cups warm water
1/4 cup sugar
3 tsp instant yeast
1/4 cup vegetable oil
6 cups all purpose flour
2 tsp salt


In the bowl of a stand mixer, combine the water, sugar, and yeast. Allow the mixture to sit for a few minutes until frothy. Add in the vegetable oil. 

In a bowl, combine the flour and the salt. Add the flour to the yeast mixture. 1/2 cup at a time, mixing well between additions. Continue adding the flour until the dough can be pulled away from the sides of the bowl with a spatula yet will still be quite sticky. (You may need to add in a little bit more (or less) flour, but the key is to remember that the dough will be sticky and will stick to your fingers when you try to pull it apart.)

Grease a large bowl, then scrape the dough into the bowl. Turn the dough to coat it in oil. Cover the bowl with plastic wrap or a towel and let the dough rise at room temperature until doubled, about 1 hour.

Turn the dough out onto a well-floured work surface. Pull the dough around to the bottom, stretching it to create a smooth ball. Cut the dough into 3 equal portions. Each ball will be approximately 1 pound of dough. 

Roll out the dough to use in your favorite pizza recipe or refrigerate until needed. (I have refrigerated it overnight, but the dough will continue to rise, even in the fridge, so try to use within 24 hours.)

To bake, preheat a pizza stone in the over as hot as you can go for at least 30 minutes -- 475°.

Lay parchment paper on your pizza stone or cookie sheet and prepare your pizza on it with your desired toppings and bake until the crust is golden, 8-10 minutes.


I'm all about convenience... I need it with our crazy schedule. But- I'm definitely tired of sacrificing quality. I need my health even more!

Who knew I could have delicious and healthy?!

It's possible. It really is. 


Pepper Bites in Under 30!


As much as I would love to have a grand display every night at dinner, that's just not in the cards for me at this point in my life. Thus, my beautiful plated meal. While weeknights may not allow for a lot of extra minutes, I do know that by adding to my prep/cook time, this delicious meal could also be pretty to look at! (I mean, check out the colors!)

I can guarantee you, that this will be a meal that I whip up again... and most likely on many occasions. Somebody say, lunch! Appetizers! Finger foods! LOW CARB! Errbody's happy with this one. 
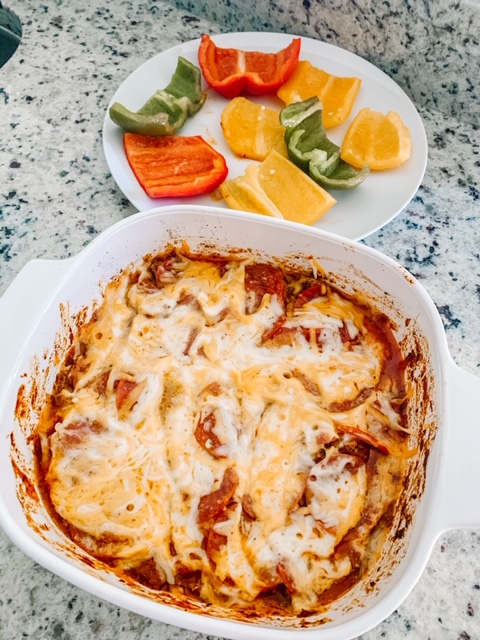
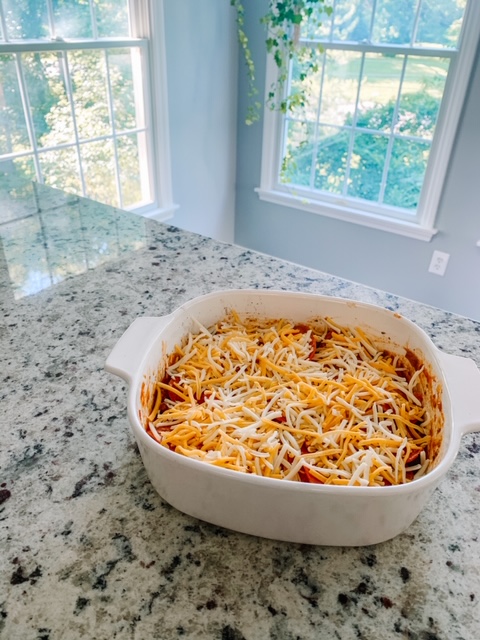
We try to stick with the healthiest possible options, so we choose super lean beef for this meal. (However, you can obviously use whatever your pretty little heart desires!) There's only two of us to feed tonight, so I only used a pound. I cooked that up and then poured it all into a casserole dish. I mixed in some sugar free marinara sauce, sprinkled with garlic powder, onion powder, and crushed black pepper, and then topped that with (you guessed it) TURKEY pepperoni, and shredded cheese. (We like colby jack, but mozzarella and parmesan would have been divine, too!) 


My husband isn't much on veggies. (He gets all of his in via shake each day.) I refuse to go that route, so peppers are my bff. I had planned to dice them up, cook them separately, and toss them into the dish once plated, but I just didn't want to spend that extra time, so I had an idea. Slice them in half and just plop them onto the meats and cheese! 


Once I did that, I covered with aluminum foil and baked for 17 minutes at 350F. Pulled it out and let it set for only a minute or two. I pulled off the peppers and put them on a plate for me.


Then, I scooped out a little more than half of this for my husband and saved the rest for yours truly. I took spoonsful of the goodness and laid them right on top of each pepper half. 


Voila! Dinner was delicious and done in under 30 minutes!

                                                        Pepper bites > bagel bites, for realz.


Next time I make this, I'm going to use mushroom caps and use this same concept for my sweets! He's pretty fond of them. I, however, am totally sticking with the peppers.

Try them out and let me know what you think!