Before and After : Open Shelves


Thank the good Lord for a husband that makes my dreams reality!

As much as I loved this home when we bought it a couple years ago, I had updates in mind from the very beginning. 

I couldn't wait to tackle the kitchen!


In our first home, we added open shelving to the kitchen, and it opened up the space so much. I wanted that again. This house, though much more spacious, has some quirky layout. (Which, if I must confess, is what I prefer.) I still didn't know if that open shelf concept would give the same effect here.

So, for the first nearly 2 years of our move, we just settled on painting the cabinets white. 


That definitely brightened up the room and brought a little life to the space, but I still couldn't let go of the open shelving. 

When you're in love with cottage core vibes, you just need some! 

I'm so grateful for my husband. He listens to my vision and helps me see it through.


I absolutely adore this corner of my home now. There's so much sunlight, counter space, storage, room, character... all the best things. 

It doesn't take a ton of money to make your home dreamy and warm. Just a little time, creativity, (there's so much inspiration available at our fingertips these days!), and the determination to make it happen.


My home is my happy place... and the more I do to make really mine... the happier it makes me.


I mean, isn't she lovely?


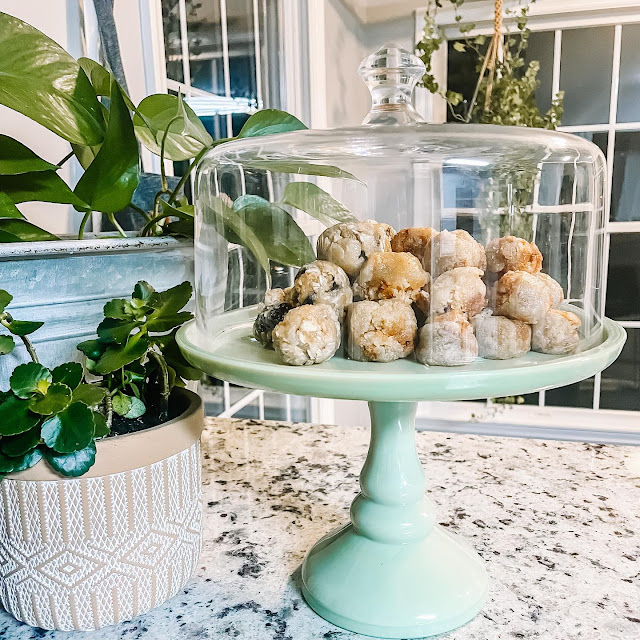
Sugar Cookie Fail or Sugar Cookie Bites?


If you missed my #nailedit Amish sugar cookie story on Instagram, you need to check it out. (Highlights>Food)

Even though the fail was an epic one, the batter was delicious, so I was determined to make the best of it! (I've become pretty good at doing that with life, ya know?)

After years of unexplained infertility, trauma, abuse, etc... one has to decide to rise above and thrive. There are days I hide intense anger. Very few people have seen the floodgates break with me, but when they do... man. I ugly cry sometimes. But after I give myself some time to actually feel my feelings, I put my attention to something better. And my life has turned out pretty great, despite all the stupid, because of that.

It works with baking, too!

So, while this recipe below will NOT get you delicious and pretty sugar cookies, it will create some incredibly amazing cookie bites... or even donut hole thingys.

We truly can see beauty from ashes as long as we determine to keep moving.

1 1/2 cups sugar
1 cup organic butter
2 eggs
1 cup Greek yogurt
3 1/2 cups almond flour
2 tsp baking powder
1 tsp baking soda
1 tsp vanilla

Cream your sugar and butter. Add eggs and beat well. Add yogurt, dry ingredients, and vanilla. Mix thoroughly. Drop by teaspoon full onto parchment lined cookie sheet. 

Bake 8-12 minutes at 350°F. (180°C)

Once the literal blob has slightly cooled, scrape the "mess" into sections so you can roll into these little bite size balls. Let them set. (If still too soft, bake them a little longer. 

I'm telling ya, they turned out really cute and truly yummy!


Broccoli, Cauliflower, Chicken Salad


This recipe is so scrumptious!

Healthy, too.

3/4 broccoli crown, chopped
1 cauliflower crown, chopped
1 cup boiled, shredded chicken
1-2 bell peppers, chopped
1/4 cup red onion, chopped
1 cup Greek yogurt
3/4 cup Mayo
Zest of 1 lemon
Juice of 1 lemon
Salt, pepper, garlic powder
Crushed red pepper, to taste
1 tsp red wine vinegar

I absolutely love food that tastes light and fresh!


Before and After : Fireplace


We've made so many changes since moving into this house, but I'm pretty obsessed with this fireplace makeover... and we only used tile and paint.

I get it; some people may have preferred to keep it all white... and we did for close to two years.


but there was no "WOW!" factor at all... and I need those in my life.

So, my loving husband, always willing to humor my crazy whims, tiled it (a while ago),


and then bought me some paint and I went to town on this thing. 


I love the finished result! Bold... beautiful. Very "warm English cottage" to me. 

I think it's officially called a "transitional style???" I don't know. Either way, I smile when I look at it. 

There's currently a cord hanging that I need to tack down, hence the side angle shot of that first "after" shot. But, hey. That's a project for another day. 

Check out how different this thing looks now!

Drastic difference... definitely for the better!


Banana Muffins


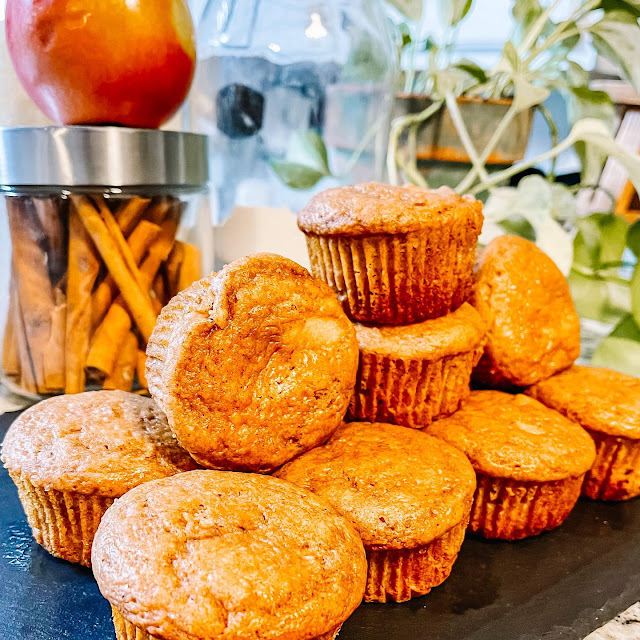
After the apple muffins turned out so well, I wanted to do something similar with bananas... because I don't do enough with them already. Ha. 

I think these were a win, too! These were just slightly denser but had a much more "muffin bite" to them. 

And, I mean, they're just plain pretty!

3 mashed, ripe bananas
1/3 cup butter, melted (we use vegan butter)
1 tsp vanilla extract
1 egg, beaten
3/4 cup sugar
2 tbsp Greek yogurt
1 1/2 tsp baking soda
1/4 tsp salt
1 1/2 cups organic, unbleached flour

In a large bowl, mix the butter into your mashed bananas. Mix in the sugar, egg, and vanilla. Next, add the yogurt. Sprinkle the baking soda and salt over the batter and mix in. 

Add the flour last. Mix just enough to blend the ingredients. 

Use parchment paper muffin cups and fill nearly to the brim. (Makes 9-12.)

Bake at 350°F for about 20 minutes. 

Abso-freakin-lutely delicious!


Kristi's Apple Muffins


Yesterday I accomplished something I've always dreamed of...

I created my very own bread/pastry recipe.

I almost always tweak or change a recipe to make it my own, but I always use the foundation that was tested and tried by someone else. 

Not this time!

I wanted to test my skills and knowledge by getting a bowl or two and throwing some ingredients in them to make a treat that looked nice, tasted great, and had soft, light texture.

I. Did. It!

These were healthy, clean, almost completely dairy free (-could be-), super light, moist, and just plain amazing. 

So proud of myself! The only baking I ever learned as a child was making box cakes with my dad. (The best times, by the way!)

Since then, I've always wanted to create something simply from my thoughts, tastes, and opinions that others would want to eat.

Try this recipe out and let me know your thoughts!

One bowl:

2 cups pan fried apples (or Amish apple pie filling)
1 1/2 cups unsweetened apple sauce
2 heaping tbsp Greek yogurt
1 egg, room temp
2 1/2 tbsp all natural maple syrup
3/4 cup sugar

Bowl #2:

1 1/2 cups unbleached, organic flour
1 tsp baking powder
2 tsp baking soda
1 tsp salt
1 tsp nutmeg
2 1/2 tsp cinnamon

Mix both bowls separately; then add the dry ingredients to the wet. Mix with whisk by hand. Once combined, mix with a spoon until incorporated. (You may need to add just a little more apple sauce if the batter feels to thick.)

Use parchment paper muffin cups; prepare tray with olive oil spray.

Fill with mixture almost nearly to the top of each cup. (Makes 12 easily, could possibly get 6-8 more.)

Bake at 350°F for approximately 20-22 minutes. (Start with 12, then check every 2-3 minutes.)

So moist and full of a very light sweetness. 


And so pretty if I say so myself.


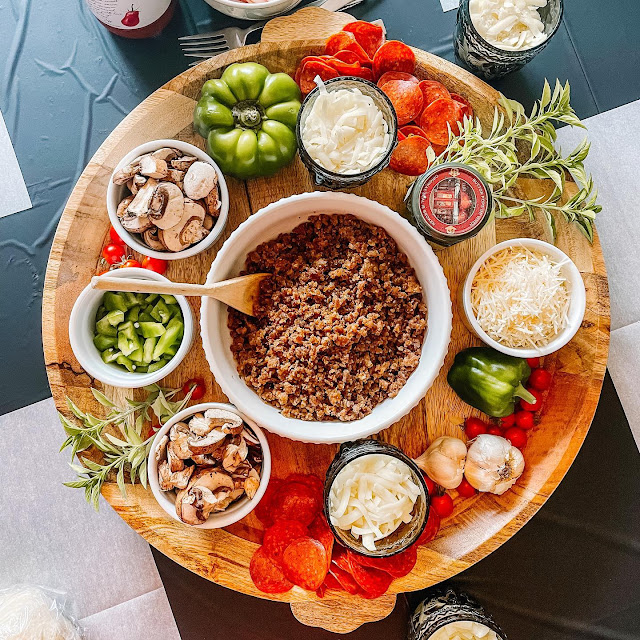
Our "Make Your Own Pizza" Party


Eating clean doesn't mean you have to cut your favorite things out of your life. 

You just make them better. 

A little while back we hosted a "make your own pizza" party, and it was such a cool experience!

And- I could do it all again while on my "cleaner" journey.


Homegrown (or locally grown) veggies, all natural cheeses, turkey burger or grass fed beef, turkey pepperoni, homemade or organic sauces... all on top of unbleached, organic flour, etc. 

Possibilities are endless. 


This pizza dough was incredible, too!

@tasteandtellblog

2 1/2 cups warm water
1/4 cup sugar
3 tsp instant yeast
1/4 cup vegetable oil
6 cups all purpose flour
2 tsp salt


In the bowl of a stand mixer, combine the water, sugar, and yeast. Allow the mixture to sit for a few minutes until frothy. Add in the vegetable oil. 

In a bowl, combine the flour and the salt. Add the flour to the yeast mixture. 1/2 cup at a time, mixing well between additions. Continue adding the flour until the dough can be pulled away from the sides of the bowl with a spatula yet will still be quite sticky. (You may need to add in a little bit more (or less) flour, but the key is to remember that the dough will be sticky and will stick to your fingers when you try to pull it apart.)

Grease a large bowl, then scrape the dough into the bowl. Turn the dough to coat it in oil. Cover the bowl with plastic wrap or a towel and let the dough rise at room temperature until doubled, about 1 hour.

Turn the dough out onto a well-floured work surface. Pull the dough around to the bottom, stretching it to create a smooth ball. Cut the dough into 3 equal portions. Each ball will be approximately 1 pound of dough. 

Roll out the dough to use in your favorite pizza recipe or refrigerate until needed. (I have refrigerated it overnight, but the dough will continue to rise, even in the fridge, so try to use within 24 hours.)

To bake, preheat a pizza stone in the over as hot as you can go for at least 30 minutes -- 475°.

Lay parchment paper on your pizza stone or cookie sheet and prepare your pizza on it with your desired toppings and bake until the crust is golden, 8-10 minutes.


I'm all about convenience... I need it with our crazy schedule. But- I'm definitely tired of sacrificing quality. I need my health even more!

Who knew I could have delicious and healthy?!

It's possible. It really is. 


Spicy Broccoli Caulifllower Chicken Salad


New favorite lunch? Maybe!

Simple, satisfying, slightly spicy, so good!


3 1/2 cups shredded, seasoned, boiled chicken
1 1/2 cups chopped broccoli
1 1/2 cups chopped cauliflower
1/2 cup turkey bacon bits
1 cup plain, Greek yogurt
1/2 cup homemade mayo
1/4 cup natural mustard
1/4 cup hot sauce of choice
Juice from 1 lemon
A couple drizzles of honey
2 tsp paprika
1 tbsp crushed red pepper
salt and pepper

Mix it all in a bowl and eat up.

Or... put in some cute little jars to take for lunch.

So fresh and so clean, clean.

Eating good tastes great!


Orange Ginger Chocolate Scones


What do you do on a snow day?

Me? Stay in my pjs and bake! (and read, watch a good show, all the best things.)

This was my first attempt at scones and they were amazing! There's just something so homey about an orange/ginger/chocolate pastry, so those are the flavors I combined. 

They were slightly softer than any other scone I've had, but my husband preferred it. 

I'll use this recipe again for him, but I'm going to try my hand at a sconier scone at some point.

Recipe:

2 1/4 cups unbleached flour
1/4 cup sugar
1/2 tsp salt
2 tsp ground ginger
1 1/2 tsp cinnamon
1 tsp nutmeg
8 tbsp cold vegan butter
1 egg (or 1 tbsp flax seed meal with 2 tbsp warm water)
Zest of 1 orange
Juice of 1 orange
All-natural chocolate chips
Oat milk (as needed)

Icing:
1 cup organic powdered sugar
1 tsp cinnamon
2 tbsp oat milk

Mix the dry ingredients in a bowl with a whisk. Once combined, create a hole in the middle of the mixture and add your egg, orange zest, orange juice, and spices.

Next, add the butter, chocolate chips, and the oat milk and mix with your hands. (You can use a pastry blender to start.)

The dough will be slightly stiff, but still moldable. It shouldn't be sticky. If it is, add some more flour.

Roll out on a prepared surface and form into a log, about 1 1/2 inches thick. 

Cut the log into triangles and place on a parchment paper lined baking sheet. Bake at 350°F for about 23 minutes. (Check during the bake; you may need to rotate.)


These were incredibly yummy, clean, and only took about 10 minutes to prepare. 

Aaron is already telling me to "make like 20 more."

Try out the recipe and tell me what you think!


Chia Pudding - 2 Ways


Let's try out this chia pudding. 

This cold is making me crave the tropics something fierce, so my first go consisted of:

2 tbsp chia seeds
1/2 cup coconut milk
1/2 tsp vanilla extract
2 tsp pure honey
(per container)

Stir the mixture up and let it sit for about 15-20 minutes. The chia seeds should be somewhat gelatinous. 

Then top with:
Fresh mango pieces
Sliced banana
Unsweetened, shredded coconut

Put in the fridge for up to 5 days or freeze for up to 3 weeks!

I come home tired, don't like to rush in the mornings... so taking just a couple of hours on a Sunday to prep for the entire week is the absolute best.

The second recipe I tried is:

2 tbsp chia seeds
1/2 cup almond milk
1/4 tsp vanilla extract
1/2 tbsp peanut butter
(per container)

Top with fresh blackberries
and drizzle with all-natural maple syrup.

The pb&j recipe only lasts about 2 days in the fridge but can still stay frozen for up to 3 weeks!

Try them out!